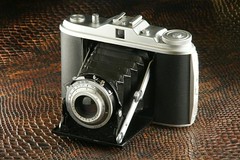
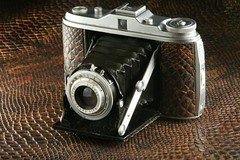
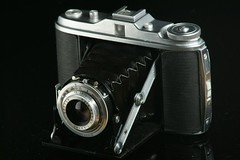
 There is a stall in the stables market in Camden Lock that sells old cameras and other nicknaks. I managed to pick up this lovely old Agfa Isolette I for 20 pounds. Built in the 1950s it sports three shutter speeds and a flash sync connector. It takes 120 roll film and like my Hasselblad it takes a 6x6 square negative. The lovely thing about this camera is that it folds up small enough that you can fit it in a coat pocket. The downside is that you have to focus using the distance scale on the lens.
A common fault with these cameras is that the focusing ring is quite often suck. The lubricant that was used when they were made turns solid and you cant focus. My one was very stiff when I got it, but holding it under the hot air dryer in the gents toilets at work softened the lubricant enough to allow it to turn freely. Unfortunately the focusing ring came free of the barrel which meant I had to screw it back on and check that the camera was still able to focus properly.
Checking focus turned out to be relatively easy. The first thing I did was make a rudimentary focussing screen out of a translucent dvd case. I just cut a square out of it roughly 6x6cm and taped it in place where the film would be. Then I turned the lights off in the front room and turned on the TV with the camera three feet from the TV. I was able to see the TV was in focus at the correct distances market on the ring. To check infinity focus I drew a cross on the screen and set the focus ring to infinity and the aperture to its maximum f4.5. Then I took my DSLR with a 135mm lens and placed it lens to lens with the Agfa. With them both focussed to infinity and set at their maximum aperture I placed a strong light behind the Agfa and looking through the viewfinder of my DSLR I could see that the cross on the focussing screen was in focus.
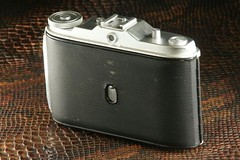
I actually picked up a second example of this camera on ebay not long after finding the first and was in even better condition. It seems that not all Isolette I cameras are made equal, this one has a sliding cover for the frame counter which makes it more suitable for colour film and the lens design is a little more elegant. The new one is more shiny and none of the leatherette is peeling. So given that I had one good Isolette and one slightly scruffy and peeling one I decided to pimp my Agfa.
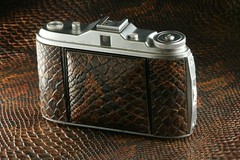
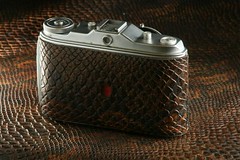
I got some brown snake PVC off ebay for next to nothing, carefully peeled off all the leatherette using a craft knife in places where it was still strongly bonded. Next I scraped of all the old brown glue with a craft knife and gave the naked camera a wash with a mild solvent, actually my daughter's nail varnish remover wipes with aloe vera.
While the solvent was evaporating off the case I used the original leatherette as a template for cutting the snakeskin. I used a craft knife and a steel ruler on a kitchen cutting board. The trickiest bit was cutting the window for the frame counter. I'll be the first to admit that it wasn't the neatest job but its good enough for me.
Attaching the new leather was entertaining. I used a spray glue that I found in Maplins, which meant that I had to mask all the areas on the camera that I didn't want to make sticky. I also covered the new leather with gaffa tape and trimmed it so that I wouldn't get any glue on the visible parts of the leather. With the leather and the camera masked off I sprayed the camera and the back of the leather panels with the spray glue. I was expecting a fine mist, but instead it was like the end scene of a gangbang movie, sticky strands flying everywhere. Very unpleasant. I left the camera and panels until the glue was touch dry and then carefully attached them. I did have a bit of trouble with the rounded corners because they kept popping up, but I solved this by wrapping the affected areas in gaffa tape which held it tight while the glue set.
The new leather is thicker than he original, but it doesn't look out of place and it gives the camera a really nice texture and heft. It makes the original feel less substantial. Truth be told, I would rather have had bright red python that the more old fashioned brown snake, but I still love it. Here are some pictures of both cameras