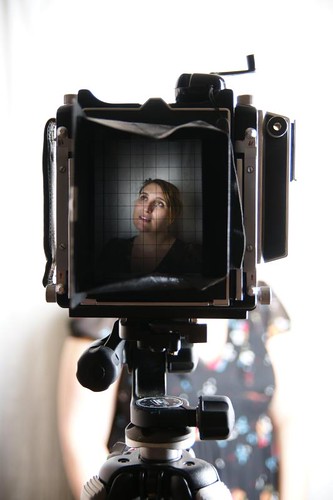
 The time had come for me to give Philip Payne his 4x5 camera. So I used up the last frame of Fuji FP100C-45 instant film that I had loaded in David Rowland's polaroid back and packed it up. I wish I had made more of the opportunity to use the camera but it was so big and bulky that it was easy to leave it in a cupboard and forget about it. But I did have some fun with it. The big instant prints are kind of gratifying and I enjoyed floating the emulsion off to make wrinkled little prints.
Its very different way of shooting. You have to be careful to do everything in the right order and almost have to rehearse each shot otherwise you risk exposing the film before you meant to. I would set the shutter to "T" mode open up the lens to maximum aperture to focus on the ground glass and then once everything was in focus I would set the shutter and aperture back to the appropriate settings for the shot, put the film back in, prime the shutter and pull the dark slide out ready to take the shot. Focussing in poor light is a complete nightmare. I think if I were shooting with one regularly I would want to use continuous lights.
One of the ironies of shooting instant film on a large format camera is that you end up taking a "Polaroid" with a digital camera to avoid wasting precious instant film.
Of course none of that is anything to do with this post. What I'm really posting about is that I needed to return the Polaroid 550 back to David with film in it, seeing as that is how he gave it to me. I thought I may as well shoot a video of it and post it up here for anyone who hasn't seen it done before. Its not terribly intuitive, but makes complete sense once you have done it once.
Unfortunately I was doing it by memory, which is not such a good idea when you start getting a bit older because the memory starts to fade a bit. The other problem is that I couldn't do a dry run. If I hadn't loaned out my Hasselblad I would have practiced on the smaller back, but it wasn't available so I had to do it in one take. I should let you see for yourself how bad the video is. A bit like acorn antiques all the important action is happening out of frame. And I managed to confuse myself half way through. Just take a look for yourself. I promise I'll do it better when I get my hasselblad back.
Does any of that make sense to you? If not here is what you need to do. First of all take out the dark slide from the back. You won't be able to open it with it in. Open the back up. There is a hinged cover up by the rollers. Pull that open and the whole thing should unfold. Then just lay the film in the case with the black paper facing the hole were the dark slide was. You don't need to thread anything through any holes, just lay it flat and make sure the paper is not curled under itself. Close the back up and replace the dark slide. You should now have a black paper tab sticking out and the white tabs should be just visible. Remembering that you need the dark slide in place! Pull on the black tab quickly straight out of the pack. Don't do it slowly like I did in the video. You should now have a white tab hanging out of the back. That's it done.
When you take the shot, just yank on the white tab and it will pull the first sheet up to the rollers. You don't want to do what I did in the video and yank it before you take a shot as you'll waste the film. After you take your first photo, pull the grey tab through the rollers in one smooth movement and you'll have your first sheet of instant film developing in your grubby mits.


No comments:
Post a Comment